How to Resolve QuickBooks Error Code H303?

If you are facing QuickBooks error H303 while using QuickBooks software, you don't have to worry. This is a common error associated with QuickBooks series H, usually in additional configuration settings when two systems are first set up to communicate and share corporate data. This error occurs which can make you unable to access data. Fixing QuickBooks error H303 You can find detailed information about this problem and every possible solution in this blog.
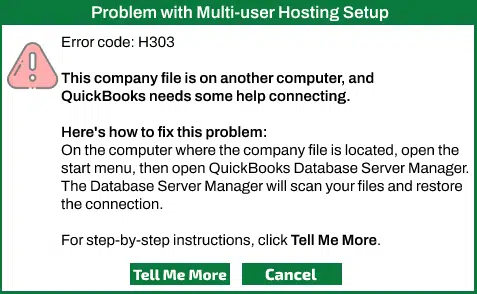
What is QuickBooks Error H303?
This is an H series code error that appears when QuickBooks
requires additional configuration to properly store company files on a
workstation. This error indicates a restricted communication process of company
files due to firewall security.
What are the causes of
QuickBooks Error H303?
The possible reasons for such an error are listed below-
·File
transfer within the system is not allowed due to a computer network problem.
·Incorrect
or collapsed or damaged. ND folder.
·Improper
hosting configuration.
·Improper
functioning of the system network.
·Restricted
communication due to firewall authentication.
·Unsuccessful
start of components such as QBFC Monitor or QuickBooks Database Server Manager
Services.
Best solutions to fix the
QuickBooks Error H303
Here we are trying to discuss you all the best solutions to
resolve this QuickBooks Error H303. If you are stuck with this error then you
must follow the below steps-
Solutions 1- Run the
QuickBooks File Doctor Tool
·Close
your QuickBooks application.
·Download
the latest version of QuickBooks Tools Hub on the server computer.
·Run
the downloaded file to install the application.
·Follow
the on-screen instructions to complete the installation process.
·Open the QuickBooks Tool Hub application and then select the 'Company File Issues' tab.
·Click
the 'Run QuickBooks File Doctor' tool.
·Find
your file from the Company File drop-down menu.
·Choose
the appropriate option and then press the 'Continue' button.
·You
will be asked to enter your QuickBooks password and then click the 'Next'
button.
Solution 2- Run QuickBooks
Database Server Manager
·When
you launch QuickBooks Tools Hub, locate and click the Network Issues section.
·Here,
you will find the QuickBooks Database Server Manager option.
·Choose
the Start Scan option.
·The
Database Server Manager will automatically fix issues related to firewall
permissions.
·After
the scan is finished, click Close.
Solution 3- Check the
Hosting Settings
·Run
the QuickBooks application in multi-user mode.
·Tap on
the File tab and select the Utilities option.
·Choose
the Stop Hosting Multi-User Configuration option from the list.
·Now
restart the application and tap on the File tab again.
·Choose
Utilities from the options and further select Host-Multi User Access.
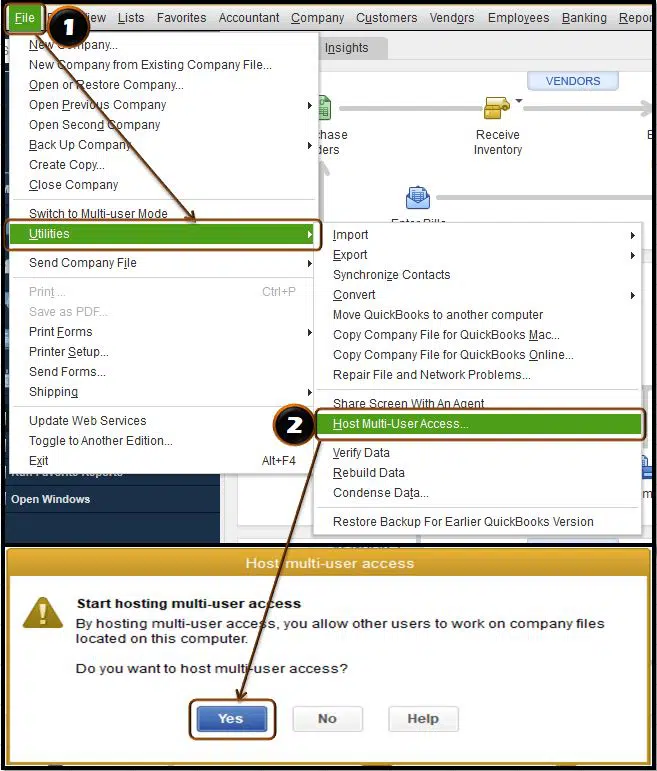
·Now restart your system and run QuickBooks again. Check if the error is resolved or not.
Solution 4- Correcting
firewall settings
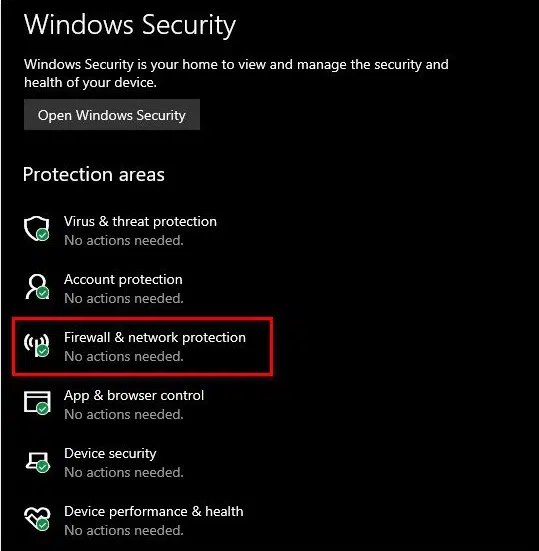
·Open
the ‘Control Panel’ via the ‘Start’ menu on your computer.
·Select
‘Firewall
Settings’ from the list of options.
·Click
the ‘Allow a program through firewall’ option.
·Add
the QuickBooks program to the exceptions list via the ‘Add a program’ option.
·Restart
your computer for the changes to take effect.
Solution 5- Change the File
Location of the QuickBooks Company File
·Create
a new folder in the hosting computer.
·Set up
Windows access permissions and sharing so that you can share company files.
·Copy
the .qbw file and then paste it in a new folder.
·Now
open QuickBooks and open your company file from the new folder.
·Try
accessing it in multi-user mode and check if the error is resolved.
Solution 6- Check the QB
settings on your desktop if you’re seeing this error
Step 1- Turn off hosting on all workstations
·Open
QuickBooks on all workstations where it is installed.
·Go to
the File menu and choose Utilities.
·If the
“Host Multi-User Access” option appears, it means that the workstation is
hosting the company file, so choose the “Stop Hosting Multi-User Access”
option.
·Repeat
these steps on all workstations until “Host Multi-User Access” appears.
Step 2- Verify the QuickBooks Services
·Press
the Windows+R keys to open the Run dialog box.
·Type
“services.msc” in the Run box and press Enter.
·Scroll
down and find the QuickBooksDBxx service, where XX is the version number of
QuickBooks.
·Check
that the service status is Running and the Startup type is Automatic. If it is
not, right-click the service, select Properties, set the Startup type to
Automatic, and then click Start.
·Do the
same for the QBCF Monitor Service.
Step 3- Set up QuickBooks to run in Multi-user mode
·Open
QuickBooks and go to the File menu.
·Select
“Switch to Multi-User
Mode.”
·If the
company file isn’t already shared, select “Yes” when prompted to share the
company file.
Step 4- Add the Server to the Windows Host File
·Open
the Run dialog box by pressing the Windows+R keys.
·Type
“C:\Windows\System32\Drivers\Etc.” in the Run box and press Enter.
·Right-click
the “hosts” file and select “Open with” and then “Notepad.”
·Add
the server’s name and IP address in the following format: “IP Address Server
Name.”
·Save
and close the file.
·Open
Windows Firewall.
·Select “Advanced Settings” on the left side.
·Right-click “Inbound Rules” and select “New Rule.”
·Select
“Port” and click “Next.”
·Enter
the port number used by QuickBooks, which is usually 8019.
·Select
“Allow the connection” and click “Next.”
·Select
the network type to apply the rule to and click “Next.”
·Give
the rule a name and click “Finish.”
·Repeat
these steps for “Outbound Rules”.
Conclusion-
In this segment we learnt about the QuickBooks Error Code
H303. Here we also discussed the causes and the possible solutions to fix the
QuickBooks Error Code H303. By following above solutions, you can rid with the
issue and the error. If you have any doubt and still need any technical
guidance then you contact our QuickBooks technical
support team at +1-888-368-8874 is suggested. You can speak our experts
they will provide you immediate guidance for your problem.


Comments
Post a Comment